How to Install Claude Code on Windows and Mac
Claude Code is Anthropic’s terminal-based AI coding assistant. It reads your codebase and helps you write, refactor, and debug. I use it daily through VS Code, connected to CodingAPI via ccswitch for cost savings.
This guide covers both Windows and macOS installation. Each platform has its own quirks, especially around environment variables and package management.
Windows Installation
What You’ll Need (Windows)
- Windows 10 or Windows 11
- Visual Studio Code
- Node.js 18 or newer
- Git (Claude Code runs git commands internally)
- A CodingAPI API key (for proxy access)
- ccswitch (optional, for CodingAPI routing)
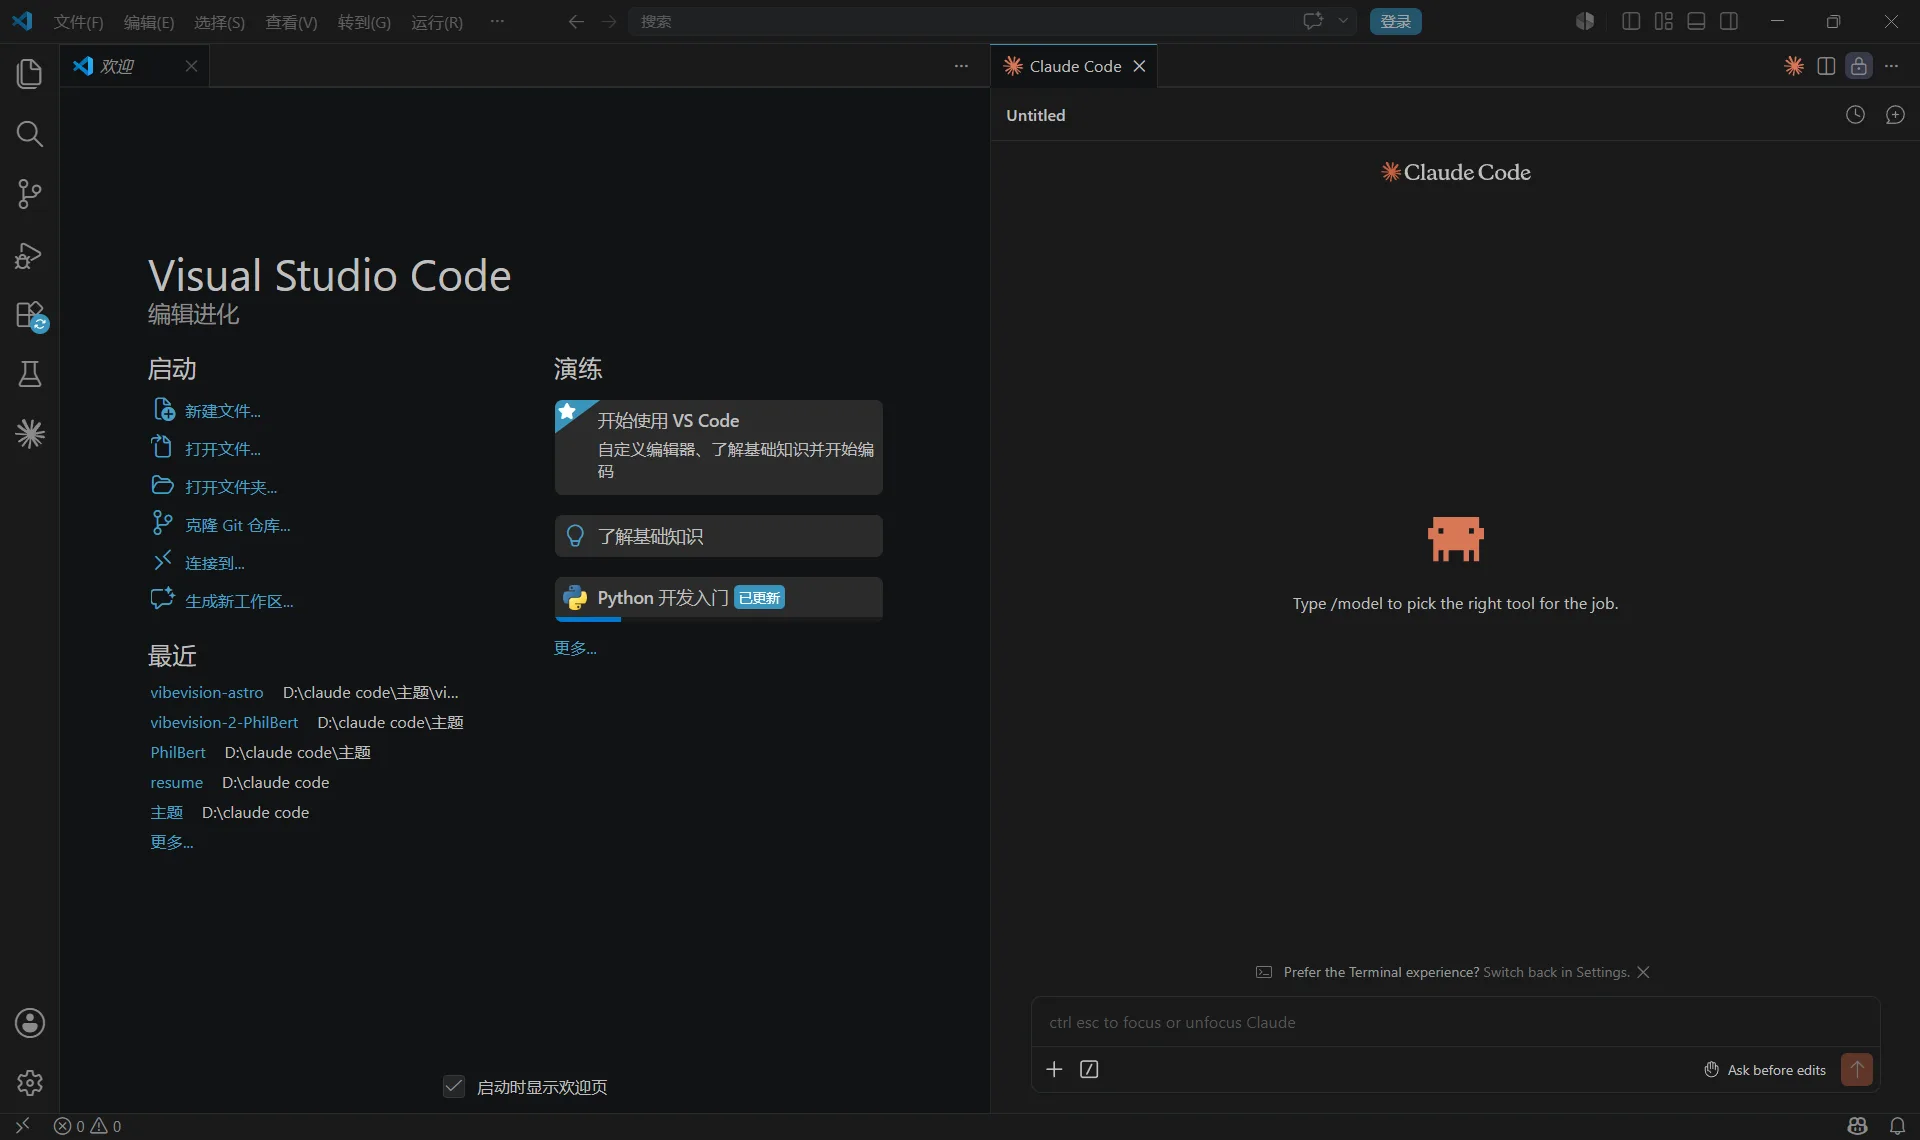
Step 1: Install Node.js (Two Options)
Claude Code is a Node.js application. You need Node 18+ installed.
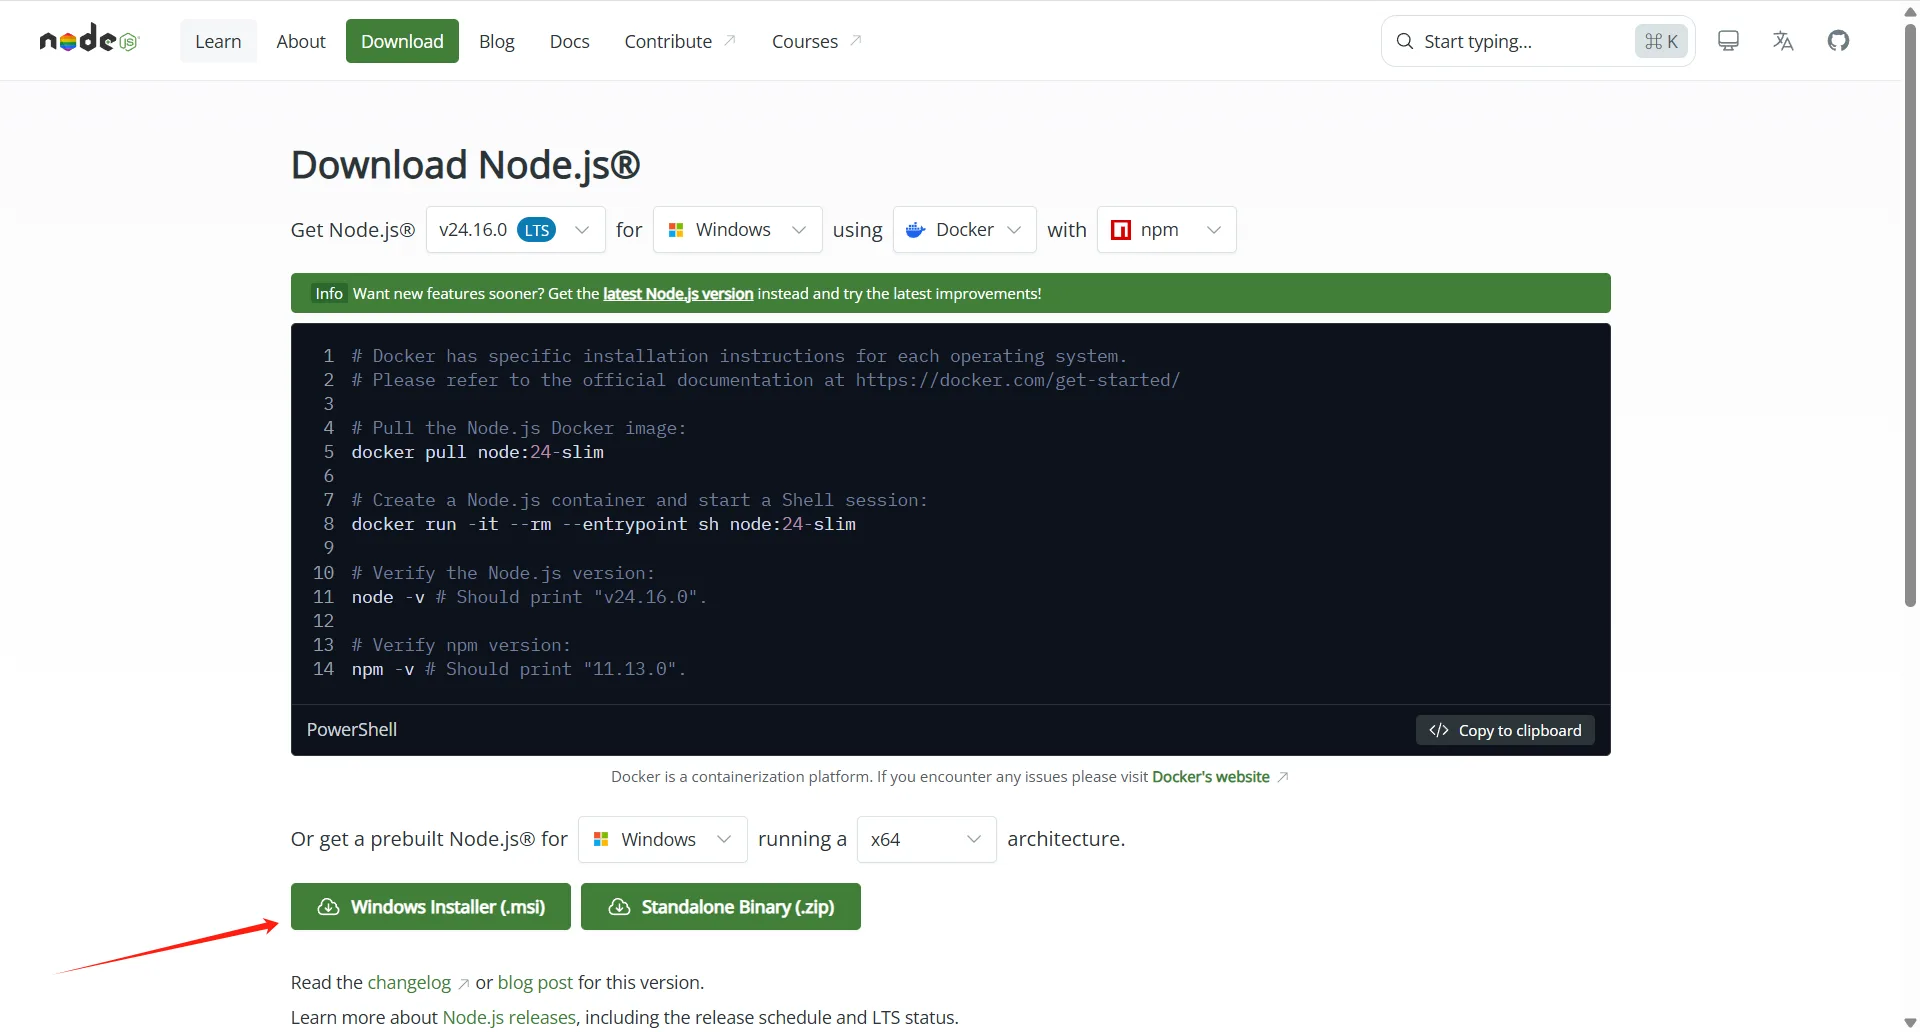
Option A: Direct Download (Simple)
- Go to nodejs.org
- Download the LTS version (not Current)
- Run the installer, accept defaults
- Check “Add to PATH” during installation
Open PowerShell and verify:
node -v
npm -v
Both commands should return version numbers. If node is not recognized, close and reopen PowerShell. Still nothing? Add the Node.js directory to your PATH manually (see Troubleshooting below).
Option B: nvm-windows (Better for Version Management)
nvm-windows lets you switch between Node versions without reinstalling. I prefer this if you work on multiple projects.
- Download the latest release from github.com/coreybutler/nvm-windows
- Run the installer
- Open a new PowerShell window and install Node:
nvm install lts
nvm use lts
Verify with node -v. nvm-windows adds Node to your PATH automatically, so you skip the manual PATH setup entirely.
Step 2: Install Git
Claude Code calls git to understand your repo history. Without git, some features fail silently.
- Download from git-scm.com
- Run the installer
- Choose “Git from the command line and also from 3rd-party software” during setup
- Leave other options at defaults
Verify:
git --versionIf you already have git installed, skip this step.
Step 3: Install VS Code
Download VS Code from code.visualstudio.com.
During installation, check both of these:
- Add to PATH (lets you open VS Code from terminal with
code .) - Register Code as an editor for supported file types
These matter more than they sound. Without them, terminal integration breaks later.
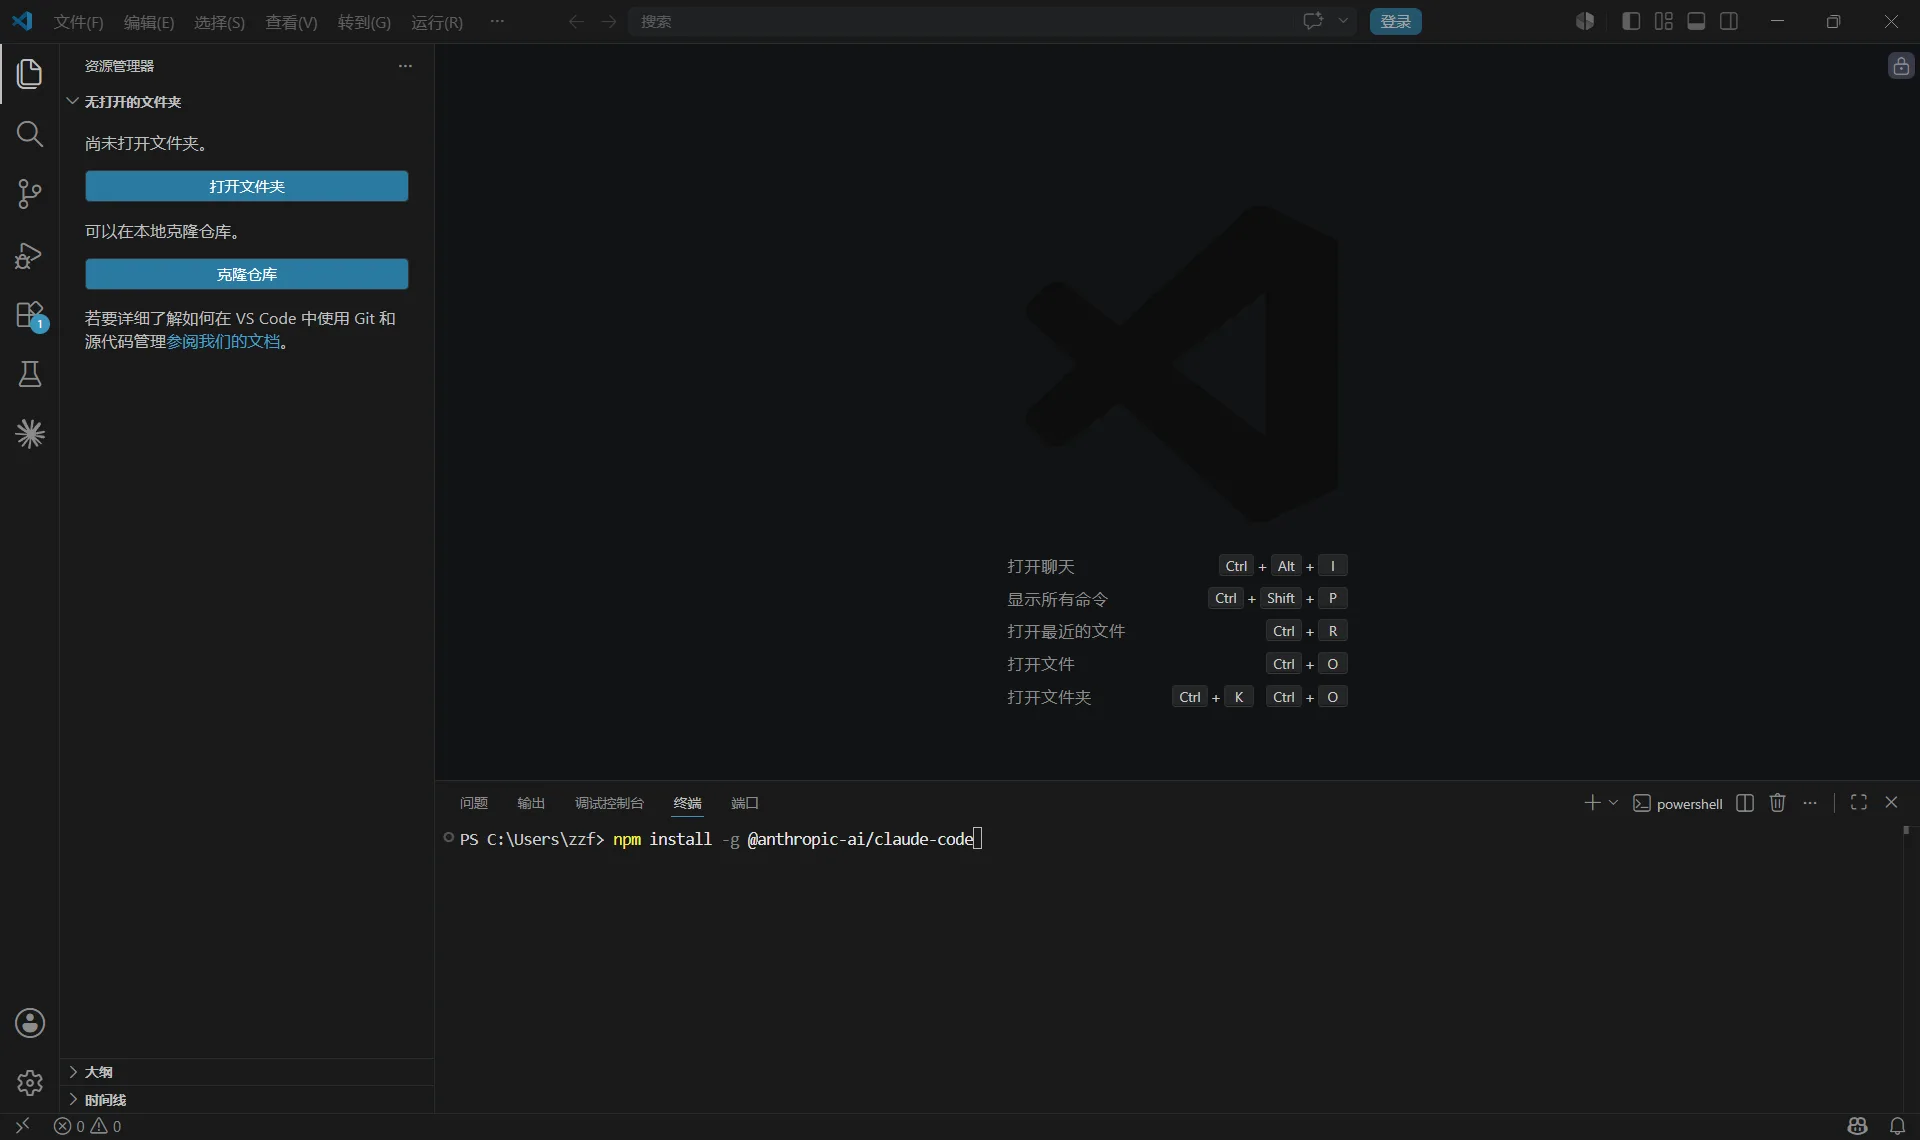
Step 4: Install the Claude Code Extension
- Open VS Code
- Open the Extensions panel (Ctrl+Shift+X)
- Search for “Claude Code”
- Install the extension published by Anthropic
A Claude icon should appear in the sidebar. If it does not, restart VS Code.
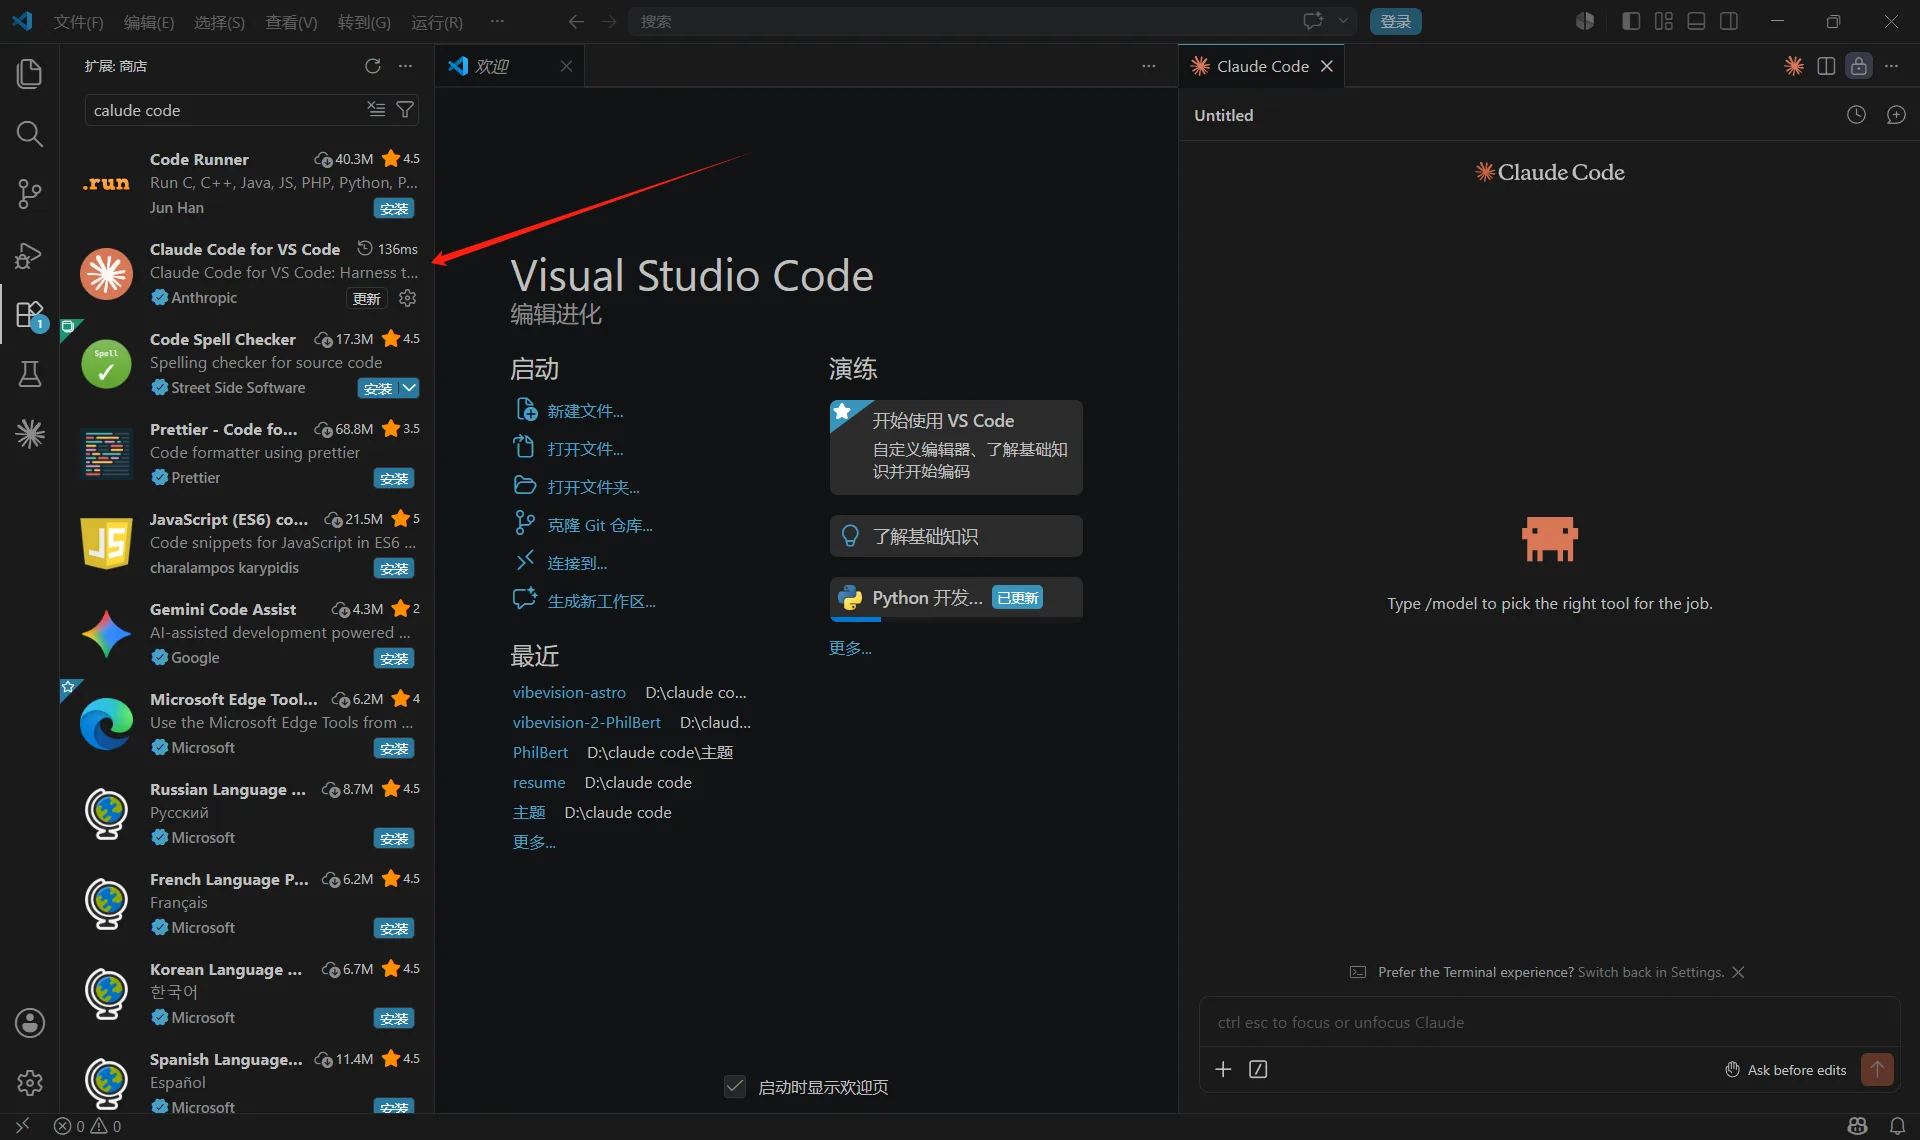
Step 5: Install Claude Code CLI
Open PowerShell as Administrator (right-click, “Run as Administrator”):
npm install -g @anthropic-ai/claude-codeThe -g flag installs it globally so you can run claude from any directory.
Verify:
claude --versionIf Windows says “claude is not recognized”:
- Find where npm installs global packages:
npm config get prefix-
Add that path to your system PATH:
- Open Start Menu, search “Environment Variables”
- Click “Edit the system environment variables”
- Click “Environment Variables”
- Under “User variables”, select “Path”, click “Edit”
- Click “New” and paste the npm prefix path
- Click OK on all dialogs
-
Close PowerShell, open a new window, try
claude --versionagain.
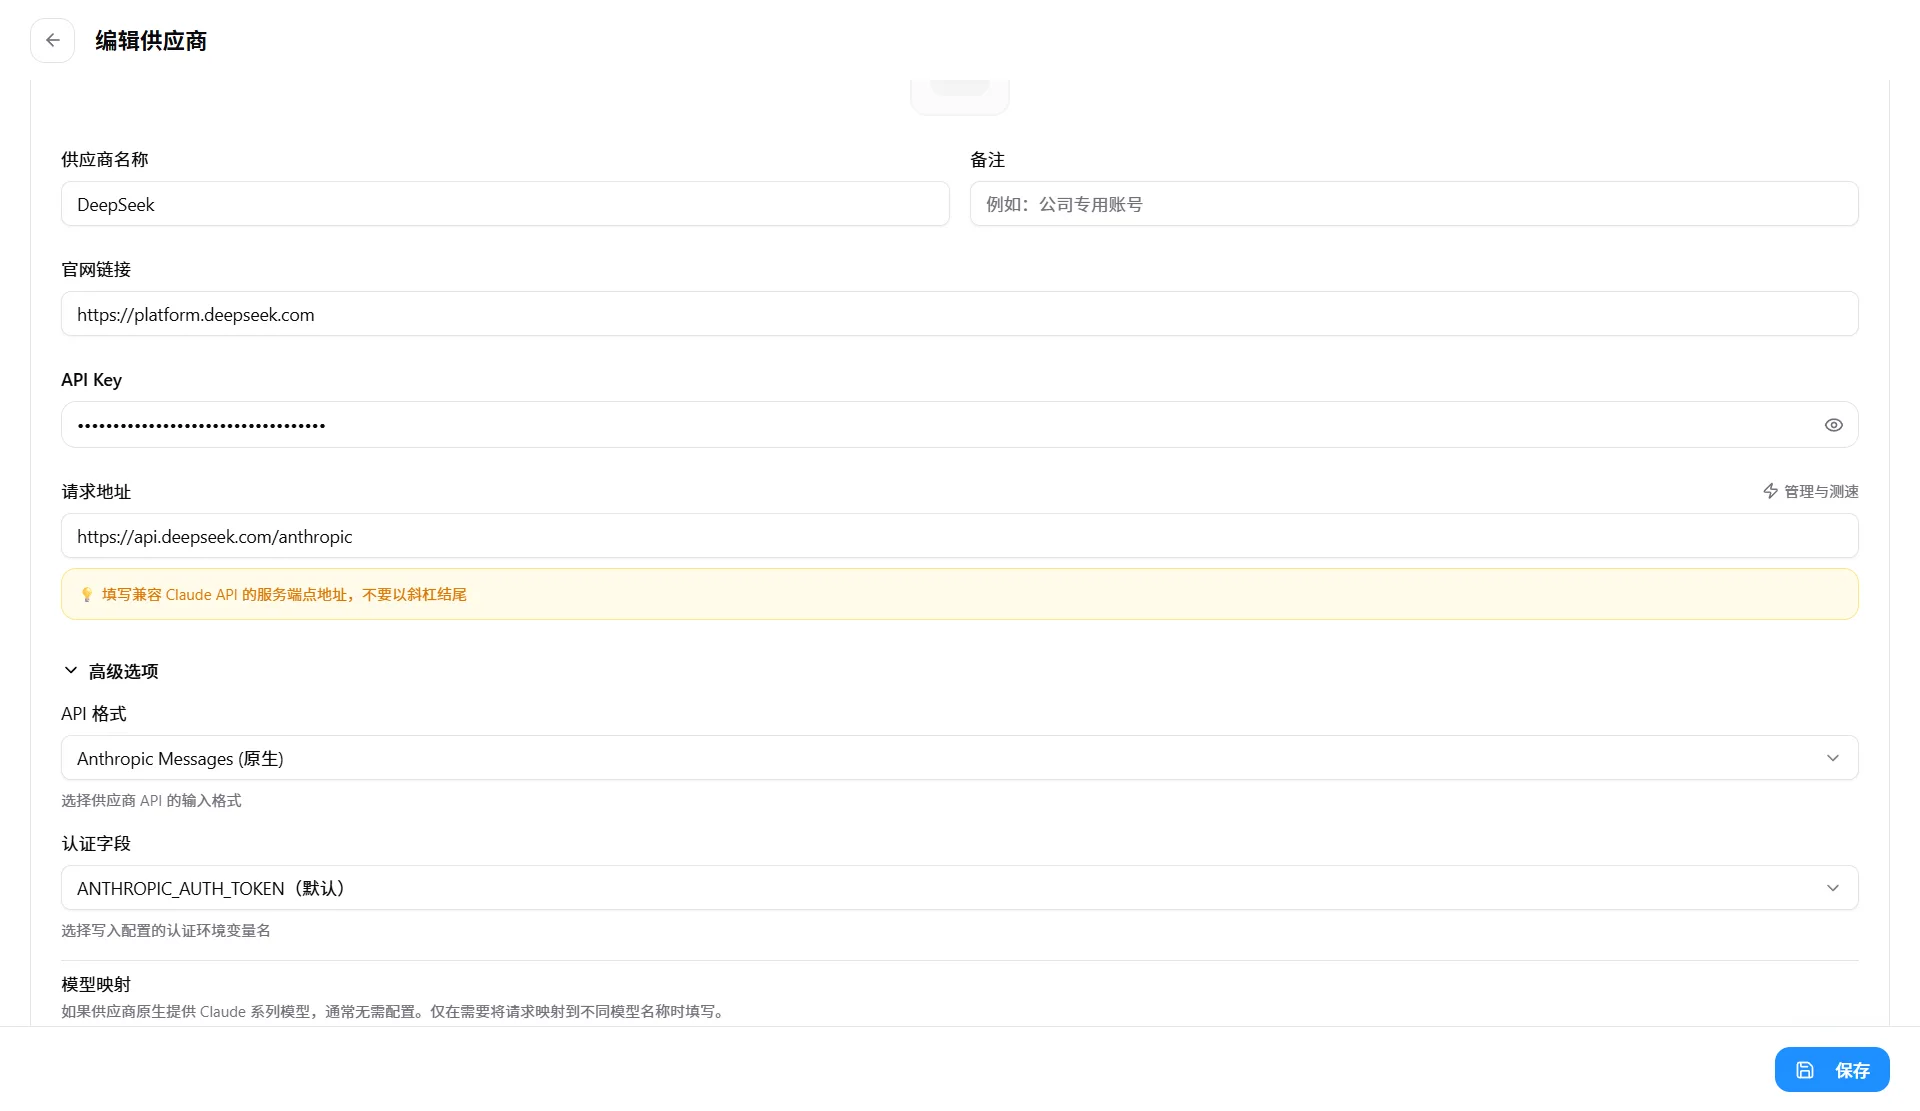
Step 6: Download and Configure ccswitch
Claude Code expects an Anthropic API key by default. If you want to route requests through CodingAPI for cost savings, you need ccswitch.
- Download from github.com/nicepkg/ccswitch/releases
- Extract and run
ccswitch.exe - Fill in the settings:
| Setting | Value |
|---|---|
| API Key | Your CodingAPI key |
| Base URL | Your CodingAPI endpoint |
| Model | (optional) |
- Start the proxy service
- Note the local address, usually
http://127.0.0.1:8080
If you do not have a CodingAPI account yet, follow the DeepSeek API key guide to set one up.
Step 7: Set Environment Variables
For Claude Code to find your API key and proxy, set these environment variables.
Via PowerShell (Current Session)
$env:ANTHROPIC_API_KEY="your-api-key-here"
$env:ANTHROPIC_BASE_URL="http://127.0.0.1:8080"
Via System Settings (Permanent)
- Open Start Menu, search “Environment Variables”
- Click “Edit the system environment variables”
- Click “Environment Variables”
- Under “User variables”, click “New”:
- Variable name:
ANTHROPIC_API_KEY - Variable value: your API key
- Variable name:
- Click “New” again:
- Variable name:
ANTHROPIC_BASE_URL - Variable value:
http://127.0.0.1:8080
- Variable name:
- Click OK on all dialogs
- Restart PowerShell or VS Code
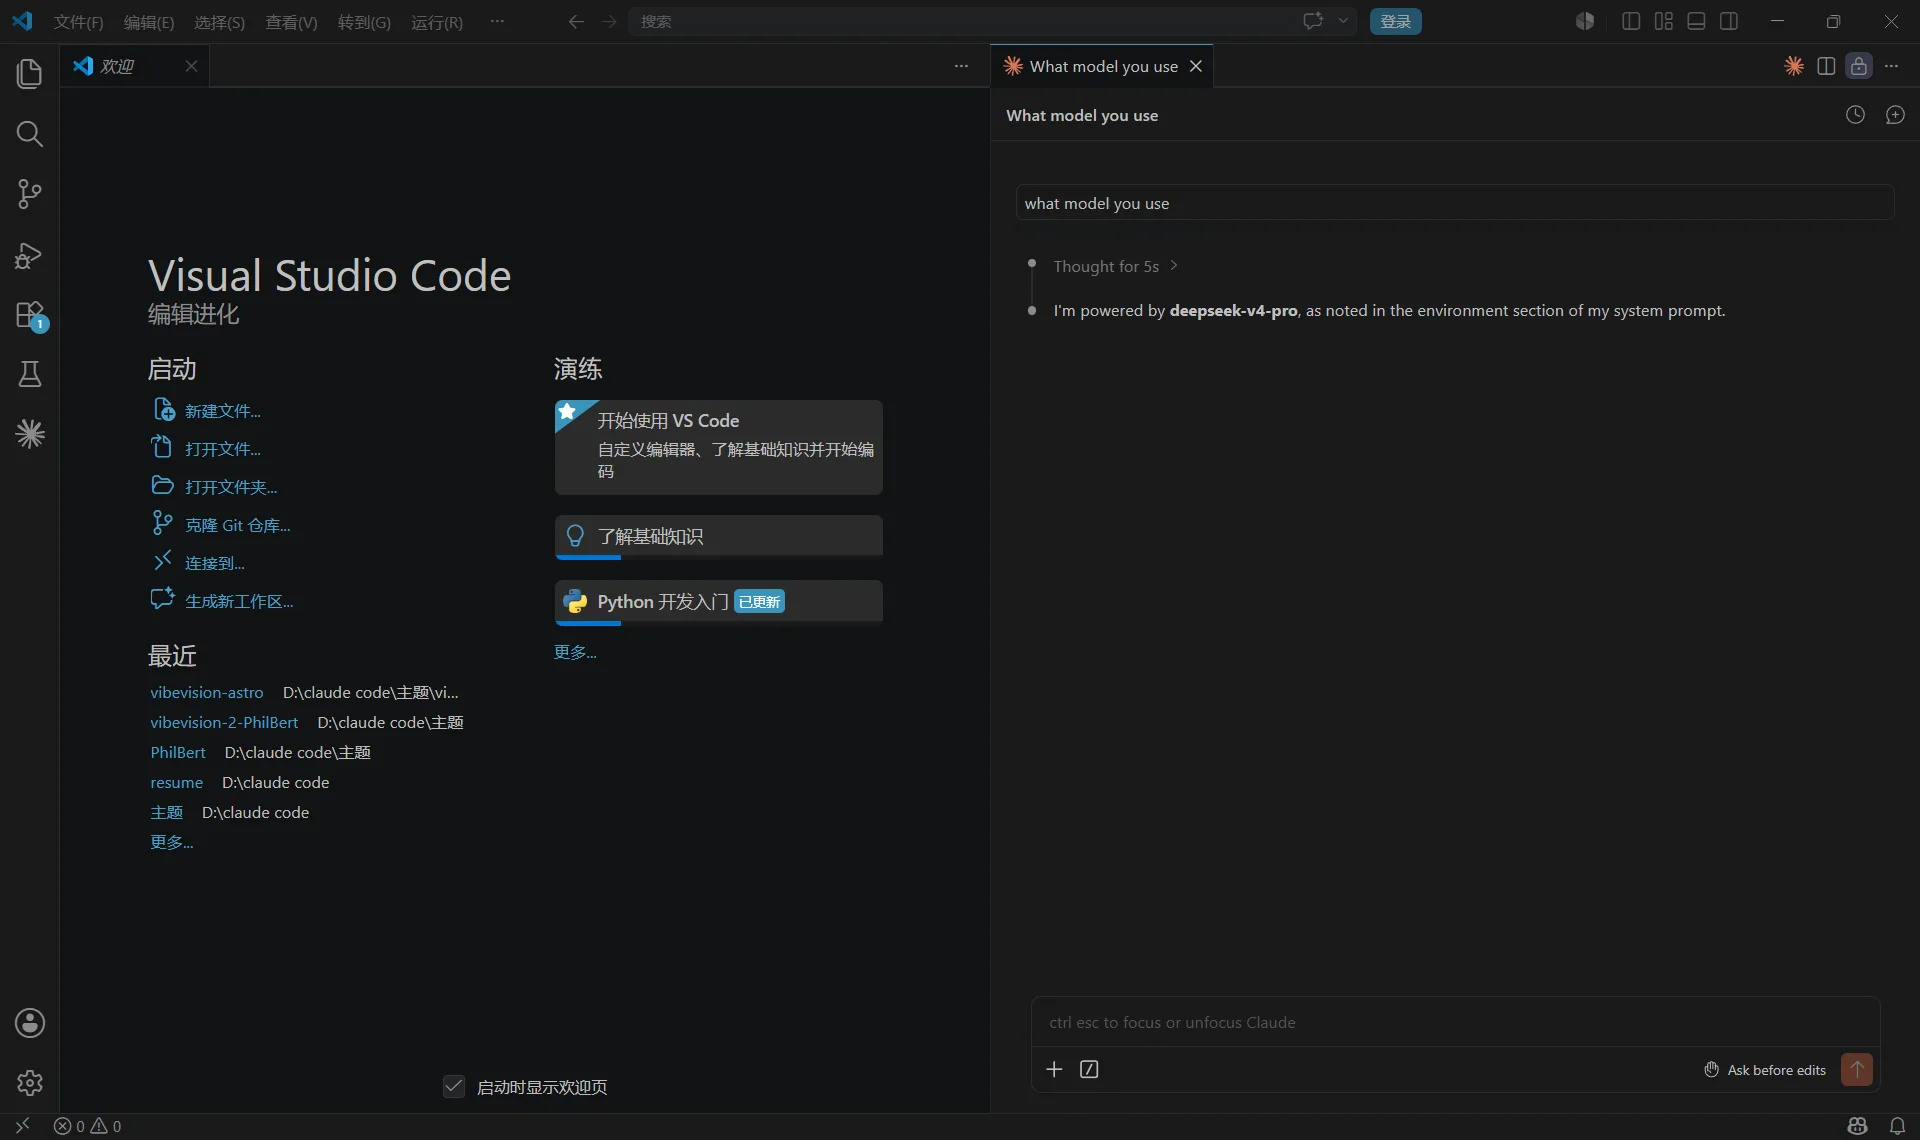
Step 8: Launch Claude Code (Windows)
Open any project folder in VS Code. Then either:
- Click the Claude sidebar icon, or
- Press Ctrl+Shift+P, type “Claude Code: Open Chat”, or
- In the terminal, run:
claudeTry a simple prompt:
Explain this file.
If everything is configured correctly, Claude Code responds immediately.
macOS Installation
What You’ll Need (macOS)
- macOS 12 (Monterey) or newer
- Terminal (built-in) or iTerm2
- Xcode Command Line Tools (for git)
- A CodingAPI API key (for proxy access)
- ccswitch (optional, for CodingAPI routing)
Step 1: Set Up Proxy (If Needed)
If you are behind a proxy or need to route traffic through a specific port, set these environment variables first. macOS sometimes defaults to its own network settings even when a proxy is enabled.
export https_proxy=http://127.0.0.1:7890 http_proxy=http://127.0.0.1:7890 all_proxy=socksAdjust the port to match your proxy software. If you do not use a proxy, skip this step.
Step 2: Install Xcode Command Line Tools
Claude Code needs git, which comes with Xcode Command Line Tools. macOS forces you to accept the Apple developer license before using these tools.
Open Terminal and run:
sudo xcodebuild -licenseRead through the license, then type agree and press Enter. You need to enter your Mac password.
If you already accepted this license before, you can skip this step. To check, run git --version. If it returns a version number, git is already installed.
Step 3: Install nvm
nvm (Node Version Manager) is the standard way to install Node.js on macOS. It lets you switch between Node versions without reinstalling.
Install nvm
curl -o- https://raw.githubusercontent.com/nvm-sh/nvm/v0.40.4/install.sh | bashActivate nvm in the Current Session
After installation, nvm is not immediately available. Activate it:
\. "$HOME/.nvm/nvm.sh"Verify nvm
nvm -vIf you see a version number (like 0.40.4), nvm is working. If you get “command not found”, close Terminal and open a new window, then try again.
Step 4: Install Node.js via nvm
nvm install 24This installs the latest LTS version. After installation, verify:
node -v
npm -v
Both should return version numbers.
Step 5: Make nvm Permanent
By default, nvm only lives in the current Terminal session. To make it permanent, add it to your shell config.
For zsh (default on modern macOS)
echo 'export NVM_DIR="$HOME/.nvm"' >> ~/.zshrc
echo '[ -s "$NVM_DIR/nvm.sh" ] && \. "$NVM_DIR/nvm.sh"' >> ~/.zshrc
source ~/.zshrc
For bash
echo 'export NVM_DIR="$HOME/.nvm"' >> ~/.bashrc
echo '[ -s "$NVM_DIR/nvm.sh" ] && \. "$NVM_DIR/nvm.sh"' >> ~/.bashrc
source ~/.bashrc
After this, open any new Terminal window and nvm will be available automatically.
Step 6: Install Claude Code
npm install -g @anthropic-ai/claude-codeVerify:
claude --versionIf macOS says “command not found”, restart Terminal. If it still does not work, check that npm’s global bin directory is in your PATH:
npm config get prefixThe output should end with /usr/local or a path in your home directory. Add it to your PATH if needed:
export PATH="$(npm config get prefix)/bin:$PATH"Step 7: Install VS Code (Optional)
If you want to use Claude Code inside VS Code:
- Download from code.visualstudio.com
- Open VS Code
- Press Cmd+Shift+X to open Extensions
- Search for “Claude Code”
- Install the extension published by Anthropic
To open VS Code from Terminal:
code .If this does not work, open VS Code, press Cmd+Shift+P, type “Shell Command”, and select “Install ‘code’ command in PATH”.
Step 8: Configure ccswitch (Optional)
If you want to route Claude Code through CodingAPI:
- Download ccswitch for macOS from github.com/nicepkg/ccswitch/releases
- Make it executable and run:
chmod +x ccswitch
./ccswitch- Fill in your CodingAPI key and endpoint
- Note the local proxy address (usually
http://127.0.0.1:8080)
Step 9: Set Environment Variables (macOS)
For the Current Session
export ANTHROPIC_API_KEY="your-api-key-here"
export ANTHROPIC_BASE_URL="http://127.0.0.1:8080"
Permanently
Add to your shell config (~/.zshrc or ~/.bashrc):
export ANTHROPIC_API_KEY="your-api-key-here"
export ANTHROPIC_BASE_URL="http://127.0.0.1:8080"
Then reload:
source ~/.zshrcStep 10: Launch Claude Code (macOS)
Open any project folder in Terminal, then:
claudeOr in VS Code, click the Claude sidebar icon and start chatting.
Common Problems and Fixes
Windows Issues
”claude” is not recognized as a command
The npm global directory is missing from your PATH.
- Run
npm config get prefixto find the path - Add it to your system PATH (see Step 5 for details)
- Restart your terminal
VS Code cannot find Claude CLI
If claude --version works in PowerShell but not inside VS Code:
- Restart VS Code (it caches the PATH at startup)
- If that fails, check that VS Code’s terminal is using PowerShell, not cmd
Execution Policy Errors
If PowerShell blocks scripts:
Set-ExecutionPolicy -ExecutionPolicy RemoteSigned -Scope CurrentUserThis lets you run local scripts without affecting system-wide policy.
macOS Issues
nvm: command not found
This usually means nvm was not added to your shell config. Run the permanent setup commands from Step 5. If you just installed nvm, close Terminal and open a new window.
Permission denied during npm install
Do not use sudo npm install -g. Instead, fix npm’s permissions:
mkdir ~/.npm-global
npm config set prefix '~/.npm-global'
echo 'export PATH=~/.npm-global/bin:$PATH' >> ~/.zshrc
source ~/.zshrc
Then run npm install -g @anthropic-ai/claude-code again without sudo.
xcodebuild: command not found
Install Xcode Command Line Tools:
xcode-select --installA dialog will appear. Follow the prompts to install.
Both Platforms
Invalid API Key error
Check that ANTHROPIC_API_KEY is set correctly:
# macOS / Linux
echo $ANTHROPIC_API_KEY

# Windows PowerShell
echo $env:ANTHROPIC_API_KEY
Verify the key is active in your CodingAPI dashboard.
Connection Refused
- Make sure ccswitch is running
- Check the port number matches your
ANTHROPIC_BASE_URL - The base URL should end with
/v1(or whatever your provider requires) - Temporarily disable your firewall to test if it is blocking the connection
Next Steps
Once everything is working, check out these guides:
- How to use DeepSeek to cut costs - Route Claude Code requests through DeepSeek for cheaper inference
- Configure your Claude.md for better results - Set up project instructions so Claude Code follows your conventions
- Create a DeepSeek API key - Get your API key before connecting through ccswitch
- Codex Product Design Plugin Guide - Bridge Figma designs to code with AI